You find two business class seats for your trip. It looks perfect. You wait. You expect your alert to catch it if it opens again. Then it’s gone. No notification. No second chance.
Why do alerts fail even when you set them correctly?
Most travelers think alerts are simple. Turn them on and wait. But that’s where things break. Alerts don’t find opportunities for you. They only track what you tell them to track. If your inputs are off, the alert is useless.
Seats appear all the time. So why do they still get missed?
The problem is not the tool. It’s how the alert is set. Too broad, and you get noise. Too narrow, and you get nothing. Most people sit in that gap without realizing it. They check again and again, unsure if they are doing it right.
Setting alerts is not about notifications. It is about precision, timing, and being ready to act. In this blog, you will learn a step-by-step system to set award alerts correctly and actually catch the seats that matter.
Why Most People Set Award Alerts Incorrectly
You are told alerts will “watch for seats.” That sounds simple. It isn’t. Alerts are not discovery tools. They are execution tools.
Most people set award alerts like this: “notify me if something good appears.” That logic fails. Alerts do not search for ideas. They monitor exact conditions you define. If those conditions are unclear, the alert cannot help you.
Here is where things break down:
- You set a broad route like “US to Europe”
- You do not lock a fare class
- You leave passenger count vague
- You skip filters to “see everything”
This creates noise or silence. Neither helps you act.
The correct mental model is different. An alert is a saved decision waiting for confirmation. You already know the route, cabin, and seat count you want. The alert exists to tell you when that exact opportunity becomes bookable.
To make this shift clear, compare the two approaches:
| Incorrect Setup | Correct Setup |
| “Find me any good business class flight” | “Track 2 business class seats on JFK → LHR on these dates” |
| Broad inputs | Precise inputs |
| Discovery mindset | Execution mindset |
If the input is wrong, the alert is useless. The next section shows how to set award alerts with precision.
Upgrade to Flightpoints Pro and receive real-time SMS alerts without gaps. Track availability continuously and never miss critical seat openings.
How to Set Award Alerts on Flightpoints (Step-by-Step)
Setting an alert on Flightpoints is not a separate task from searching. It is the search. You define the exact trip conditions you care about, then turn that setup into ongoing monitoring. That is what makes the alert useful later.
The process only works when each input is intentional. If your route, date range, cabin, or passenger count is off, the alert will follow the wrong conditions. Use the steps below as a build sequence, not a form you rush through.
Here is the full setup flow on Flightpoints Alerts:
1.1 Open the Alert Creation Page
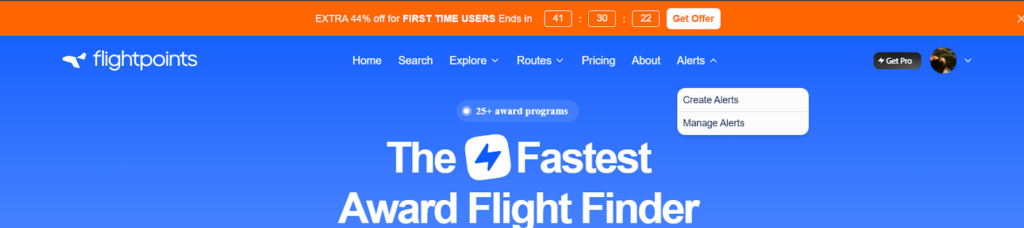
Start at the Flightpoints alert creation page. You will see a search-style form rather than a simple notification toggle. That distinction matters because the platform is asking you to define a trackable travel condition.
Use this page with the right mindset:
- You are building a search first
- You are defining what the system should keep watching
- You are not asking it to find “anything good”
| What You See | What It Means |
| Search-style input form | You must define exact trip conditions |
| Alert setup page | Your search will become automated monitoring |
| Structured fields | Better inputs lead to better alerts |
1.2 Enter Your Route
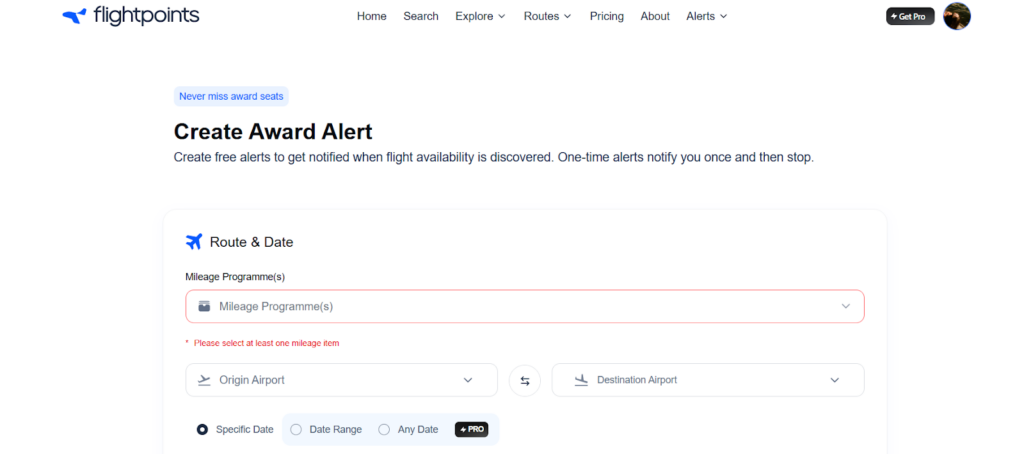
Next, enter your departure and arrival airports. Be exact. Use airport codes or clearly defined airports, not broad regions or wishful categories.
A strong route input looks like this:
- From: JFK
- To: LHR
A weak route input sounds like this:
- “USA to Europe”
- “Any London airport”
- “East Coast to somewhere in Europe”
Here is the difference:
| Broad Route Idea | Useful Alert Route |
| USA to Europe | JFK to LHR |
| New York to London area | JFK to LHR or EWR to LHR |
| East Coast to Paris | BOS to CDG |
This route defines what Flightpoints will monitor. If the route is vague, the alert will be vague too.
1.3 Select Travel Dates
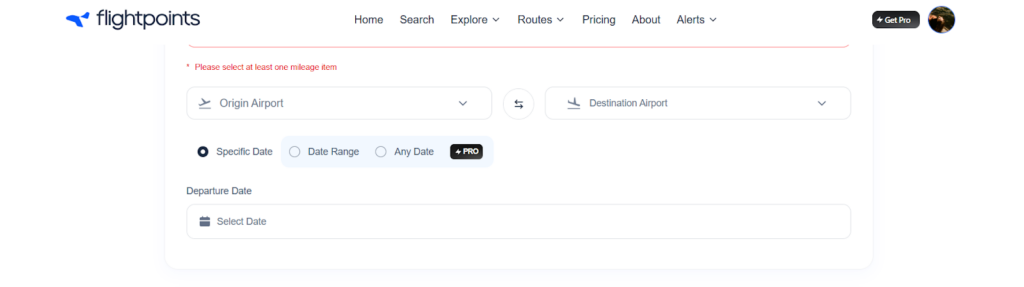
After the route, choose your travel date or date range. This is where you decide whether you are tracking one fixed plan or a wider booking window.
Use date logic based on your trip type:
- Fixed trip: choose one exact date
- Flexible trip: choose a broader date range
- High-priority trip: consider setting one exact-date alert and one flexible backup alert
That structure helps you avoid wasting alert coverage on dates you would never book.
| Travel Situation | Better Setup |
| Honeymoon with fixed departure | Exact date |
| Flexible premium cabin trip | Date range |
| Family trip with some flexibility | Exact date plus backup nearby dates |
A wider range can improve your chances, but only if you would realistically book those dates.
2. Choose Cabin Class
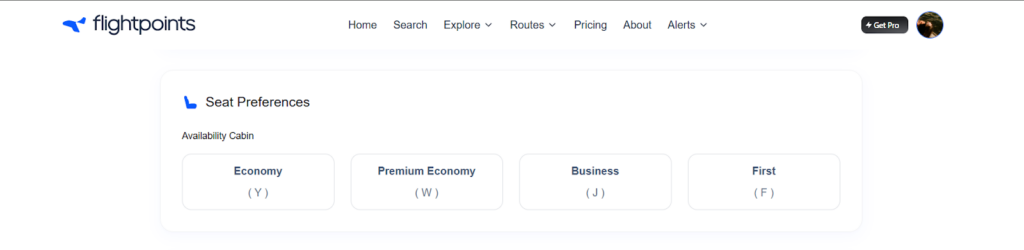
Now select the cabin you actually want to fly. Flightpoints lets you define whether you want:
- Economy
- Premium Economy
- Business
- First
This selection is not just about comfort preference. It maps to the award inventory the system will watch. That means your alert logic changes based on cabin choice.
Keep the setup honest:
- If you want business class, select business class
- Do not choose economy just to “see something”
- Do not assume one premium cabin is interchangeable with another
| Cabin Choice | What It Does |
| Economy | Tracks economy award opportunities |
| Premium Economy | Tracks premium economy availability |
| Business | Tracks business class inventory |
| First | Tracks first class inventory |
A mismatched cabin creates bad alerts later, even if the rest of the setup is correct.
3. Apply Filters
Filters remove noise and improve relevance. This is where most alert quality is decided.
Based on the interface, you may see:
- Only direct flight
- Minimum seats
- Max cost in points
- Max taxes or fees
- Max number of stops
- Specific fare class
- Operating airlines
- Specific flight number
- Exclude carriers
Use filters with intent:
| Filter Type | Outcome |
| No filters | High noise |
| Tight filters | High relevance |
| Balanced filters | Best signal |
Key insight: fewer, better alerts are more useful than frequent alerts.
4. Review Your Criteria Before You Set Award Alerts
Before you save the alert, review every field carefully. This is where many missed opportunities start. Small input errors create bad monitoring conditions.
Check these items one by one:
- Route is correct
- Dates match your real trip plan
- Passenger count is accurate
- Cabin reflects what you actually want
- Filters are not too loose or too restrictive
Use this review table before saving:
| Review Item | What to Confirm |
| Route | Exact departure and arrival airports |
| Dates | Correct day or range |
| Cabin | Actual target cabin |
| Passengers | True seat requirement |
| Filters | Only useful constraints applied |
This is the last chance to catch setup mistakes before the alert goes live.
5.1 Choose Alert Type and Notifications
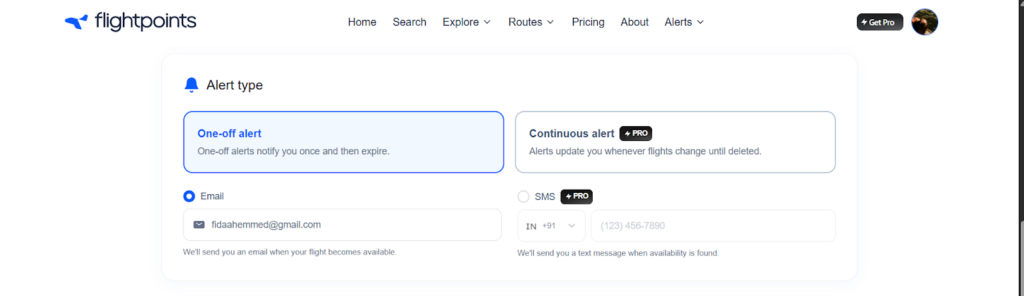
Now decide how you want to be notified. This directly affects how fast you can act.
From the interface, you have:
- One-off alert
- Triggers once, then expires
- Continuous alert
- Keeps tracking and notifying until you stop it
Notification options include:
- Email alerts
- SMS alerts (if enabled)
Use this structure:
| Alert Type | Best Use |
| One-off | Single opportunity tracking |
| Continuous | Ongoing monitoring |
| Notification | Purpose |
| Standard tracking | |
| SMS | Faster response |
Make sure:
- Notifications are enabled
- Emails do not go to spam
- You actively monitor alerts
Speed matters because seats disappear quickly.
Get Flightpoints Pro to enable continuous alerts and instant SMS notifications. Stay ahead of availability changes and act before seats disappear.
5.2 Click Create Alert

Once the setup looks right, save the alert with a trip name.
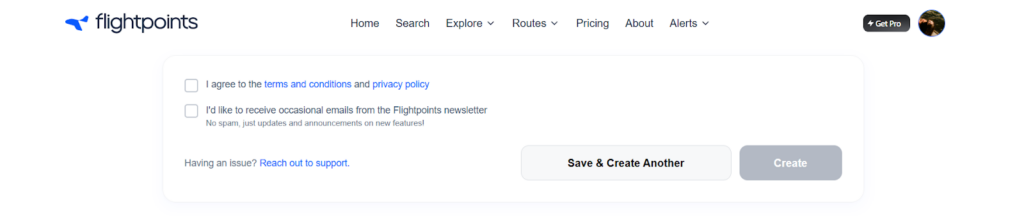
Then click the Save and Create Another if you want to save this alert and move on to creating another one, or just Create button. This is the point where your search stops being manual and becomes automated.
What happens at this stage:
- Your criteria are stored as a live alert
- Flightpoints begins monitoring for matching availability
- You no longer need to rerun the same search repeatedly
| Before Clicking Create Alert | After Clicking Create Alert |
| Manual search setup | Live automated monitoring |
| You keep checking | The system keeps checking |
| Search stays temporary | Search becomes persistent |
This is the core utility of the feature. You define once. The system keeps watching.
6. Confirm Notifications
After creating the alert, make sure your notifications are set up correctly. An alert only matters if you actually see it when it triggers.
Check these basics:
- Email notifications are enabled
- Notification messages are not going to spam
- You are monitoring the inbox tied to your account
- Any app-based notifications, if available, are turned on
A quick checklist helps here:
| Notification Check | Why It Matters |
| Email enabled | So you receive the alert at all |
| Inbox monitored | So you see it quickly |
| Spam checked | So alerts are not buried |
| App notices on, if supported | So you catch time-sensitive openings faster |
Fast response matters because availability can disappear soon after it opens.
7. Track and Manage Your Alerts
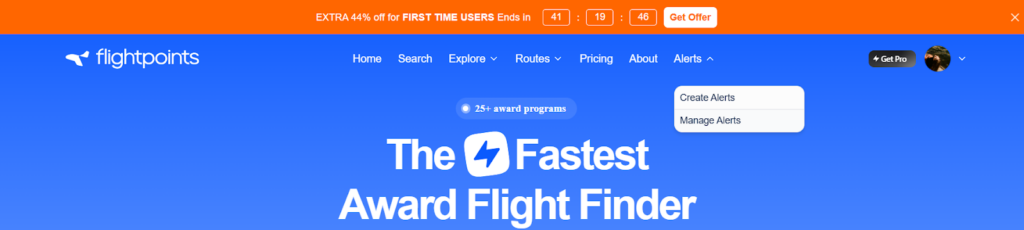
Once the alert is live, go to your alert dashboard to manage it over time. A good alert strategy is not static. You may need to adjust it as your dates, routes, or priorities change.
From your dashboard, you should be able to:
- Edit alerts
- Delete alerts
- Duplicate alerts
That matters because a strong setup often involves multiple alert versions rather than one perfect alert.
| Dashboard Action | Best Use |
| Edit | Tighten or broaden criteria |
| Delete | Remove low-value alerts |
| Duplicate | Create backup versions faster |
This makes it easier to build a layered monitoring plan without starting from scratch each time.
What Happens After You Set Award Alerts
Once created, the system runs searches continuously against the conditions you saved. When availability matches your setup, you get notified. That removes the need for repeated manual checking.
The process looks like this:
- You save a precise search condition
- Flightpoints keeps monitoring it
- You get notified when the match appears
- You act when the seat becomes bookable
| Your Role | Flightpoints’ Role |
| Define the right criteria | Monitor those criteria continuously |
| Stay ready to book | Notify you when a match appears |
| Adjust the plan if needed | Keep running the saved search |
That is the mental model to keep in mind. You are not setting a reminder. You are saving a booking condition the system will keep testing for you.
Use a Layered Strategy After You Set Award Alerts
A single alert can work, but layered alerts usually work better. This is especially true for premium cabins, family trips, and routes with inconsistent award space.
A practical structure looks like this:
- Primary alert
- Exact route
- Exact date
- Exact cabin
- Flexible backup
- Same route
- Date range or nearby dates
- Alternate-route backup
- Nearby departure airport
- Nearby arrival airport
- Different connection pattern
Use this table as a simple framework:
| Alert Type | Setup Purpose |
| Primary alert | Tracks your ideal booking |
| Flexible backup | Catches nearby-date openings |
| Alternate-route backup | Expands options without going broad |
This raises your chances without turning your alerts into noise.
Common Mistakes to Avoid When You Set Award Alerts
Even a strong platform cannot fix weak setup logic. Most alert failures come from preventable mistakes during input.
Watch for these errors:
- Setting alerts too broadly
- Using the wrong passenger count
- Skipping filters entirely
- Not being ready to book once the alert arrives
Here is the impact of each mistake:
| Mistake | What Happens |
| Alert too broad | You get too many low-value notifications |
| Wrong passenger count | Alert triggers but does not solve your booking need |
| No filters | Irrelevant options crowd the useful ones |
| Not ready to book | The seat disappears before you act |
The best alert is not the one that triggers most often. It is the one that triggers when you can actually move.
A Simple Mental Model for Flightpoints Alerts
Keep the process simple in your head. You are saving a strong search condition, not asking the platform to think for you.
That mental model looks like this:
- You define the exact booking condition
- Flightpoints runs it continuously
- You respond when the condition is met
If you keep that framework in mind, your setup gets sharper. Your alerts get more relevant. And your odds of catching the right seat improve.
Set your first alert on Flightpoints and track the exact seats you want. Stop rechecking manually and get notified the moment availability appears.
Why Flightpoints Makes It Easier to Set Award Alerts Correctly
The issue is not lack of tools. It is a lack of clarity during setup. Most workflows force you to piece together information across multiple tabs. That slows you down and increases mistakes.
Flightpoints reduces that friction by guiding your decisions at the input stage. You define your intent once. The system handles the monitoring.
Here is what changes when you use a structured platform:
- Clean input leads to better alerts: You define route, cabin, and seats in one place. No fragmented steps.
- Reduced workflow fragmentation: No switching between airline sites, forums, and spreadsheets.
- Faster decision cycles: You receive alerts that match your exact criteria. No filtering after the fact.
Get Flightpoints Pro today and catch premium seats faster with accurate alerts. Save 44% now and stop missing high-value award availability.
Q: How should you prioritize which routes to set award alerts for first?
A: Focus on routes with high redemption value and limited seat release patterns. Prioritize long-haul premium cabins and multi-passenger itineraries over low-value or easily available routes.
Q: When should you adjust or pause active award alerts for better results?
A: Adjust alerts when travel plans shift or when availability patterns change over time. Pause low-performing alerts to free up slots for higher-probability routes.
Q: How can you align award alerts with transferable points programs for faster booking?
A: Set alerts based on programs where you already hold transferable points balances. This reduces delay between alert trigger and booking execution.
Q: How do timing and notification response impact success with award alert tracking systems?
A: Faster response times increase your chances of securing newly released award seats. Delayed action often results in losing availability to other travelers monitoring similar routes.